Wednesday, August 31, 2011

Favorite Things- TV Shows

I'm always kind of bummed that my regular shows are on re-runs during the Summer but this Summer there have actually been a few shows that have been pretty good. Here are a few of my favorite from this Summer.

I'm kind of sad that these are coming to and end:

1. HGTV's Design Star {Mondays on HGTV}


2. Big Brother {yup, Big Brother; Sundays, Wednesdays, Thursdays on CBS}
3. Suits {Thursdays on USA}

And a few of my favorites that I'm looking forward to this fall:

1. Modern Family {Wednesdays on ABC}

2. Amazing Race {Sunday's on CBS}


And I was so sad to find out that this show was cancelled:


What am I going to do without the Walkers?


Monday, August 29, 2011

Wall Collage


I have always loved wall collages, and have always had some form of them in my house. So with this new house, I knew I wanted to put one up. My husband and I have also had many a "tiffs" whilst hanging our wall collages. Let's just say I'm like, "a little to the right", and he is like "it's totally straight". So this time around I was determined to get it right, and I attempted to do it on my own.

I had seen pictures of tracing and cutting all the frames you want to hang and marking where the nails would go. This sounded like a no-fail solution....and it almost was. Haven't seen what I'm talking about, here are some examples:


So I had my wall, chose the frames I wanted and began taping. I also knew I wanted to make a complete rectangle which ended up being a little tricky because you need to make sure you have enough/the right size frames to do so. Here are my lessons learned:

1. Just because you have the exact same picture frame, from the same store and the same size does not mean the hook to mount the picture is in the same place. I had 3 of the same frame and just made 3 copies, didn't work. You see for some reason each had the picture hanger in a slightly different place, which ended up in crooked, not equally spaced pictures.

2. Double check where your hooks are on your frames compared to where you have marked them on your paper. I had a bit of a problem when I put a nail in to where the hook was apparently going to be, only for it to be two inches off.

3. Enlist your husband to help you, because at the end of the day he is going to want to help you anyways.

Here are some pictures of the process:


A little help from the husband:

The final result:


Thursday, August 25, 2011

Month of Meals- September

I cannot believe it is the end of August! I have spent the past week and a half moving {hence the blog neglect}. Who would have thought one could accumulate so much stuff in 4 years of marriage. We are really excited about our new place. I'll post pictures soon. I had a few minutes of downtime when the cable guy was here and I was waiting for Pottery Barn to come deliver our new couches {yay!} to put together September's meals.

My meal plan for the end of August has been a complete failure. Between packing, moving and more packing our dinners have been sad. Last night I tried to serve leftovers of a frozen meal I think I made back in May {maybe April}. Hopefully September will be more of a success. And thanks to my obsession with Pinterest, I hopefully have made some of my meal planning a lot easier. I am a big fan of cook books with pictures; I like to see how things are supposed to look before I make them. I searched "healthy dinners" within Pinterests' Food page and found some great recipes, all with awesome photos. I then pinned them to my new board "What's for Dinner". You can check out the recipes I've chosen here. All I have to do is go to the board, click on the image and it will direct me to the recipe source.

I also added a few of my own as well as some from this month's Cooking Light. Hopefully I'll have more success in this upcoming month! Here are a few things that are on the menu:

Tortellini Primavera {pinterest}
Stir Fry Chinese Egg Noodles {CL}
Garlic Lemon Chicken {pinterest}
Chicken & Roasted Garlic Lasagna {pinterest}
Crock Pot Santa Fe Chicken {pinterest}
Chicken Tostadas & Avocado Dressing {CL}
Chimichuri Chicken/Pork {Mom's Recipe}
Lettuce Wraps {a staple in our house}
Waldorf Salad {CL}
BBQ Chicken Salad {CL}
Panko Crusted Chicken Salad {another staple}
Cheese Ravioli with Pesto {CL}

I know you see we eat a lot of chicken. I haven't eaten red meat in over 15 years and my husband doesn't eat fish so basically my choices are chicken, pork, and more chicken. I'll throw turkey into the mix every now and again.


Tuesday, August 16, 2011

Baby Food Price Comparison

Let me start this post by admitting I was planning on making all my own {organic of course} baby food for Miss Morgan. Well, when the time came I made some carrots and I just wasn't that into it. It took more time than I thought, required cooking, blending, freezing, making sure it wasn't too thin or too chunky, etc... I love to cook but found out that baby food isn't all that exciting to make. So I went and bought some Gerber Organics baby food at Target, and didn't feel one bit guilty that I wasn't making it. I knew it was made with all organic ingredients, some included DHA {which I couldn't put in my own} and other vitamins that would only be beneficial to her growing little body.

I was surprised at how much the prices fluctuated, which got me thinking I should do some research on what brand was the cheapest because let's face it, how much could the taste fluctuate from brand to brand {prunes are prunes, right}?

First, I narrowed my search to stage 2 {mostly 4 oz jars} and only organic. Second, these are the standard prices, if you can find one's on sale there is a good chance that will be the better deal.

Here is what I found {prices are per oz.}:

Diapers.com Target Amazon Babies R Us
Plum Organics 0.33 0.33 0.30 0.31
Earth's Best 0.23 0.19 0.19 0.20
Happy Baby 0.36 0.25 0.29 0.00
Sprout 0.36 0.00 0.40 0.37
Gerber 0.23 0.23 0.20 0.25

If the price is $0.00, that store didn't cary that brand.

So the winner appears to be Earth's Best, from Amazon. Amazon had good prices all around and if you subscribe and save, you will get them even cheaper. I have a Prime account {thanks to Amazon Mom, you should check it out if you haven't already}, which gives me free 2 day shipping and the items are tax free {which I know will probably not last that much longer}.

So there you go, baby food cost 101. And if you are one of those mom's that is motivated to make your own, more power to you!

Monday, August 15, 2011

Stripes


Everywhere I turn there are so many fun geometric prints. I love them all.

Quatrefoil:


Greek Key Print {Etsy}:

Chevron {West Elm}:

So many to choose from:

And while all these are great...sometimes I just feel like some stripes!

Thinking about using this shower curtain from West Elm as curtains in the family room.

I'm currently enjoying a couple of these Dash & Albert rugs in the kitchen.
Just purchased this striped rug for the family room from Crate & Barrel. They are a great price too, the 8x10 is $299 which I thought was great for that size rug.

Saturday, August 13, 2011

Favorite Things- Fall

Where has the Summer gone? It doesn't really seem like Summer today, why is there still June gloom in August? I love Fall, especially after Labor Day because the crowds dwindle down and we usually have better weather. I really wished I lived in a place where I got to see this:

But here in Southern California you usually know it is Fall when you start to see this:

and this:

There are so many fun things out for the Fall season. Here are a few of my favorites that I've come across {fyi- these are splurges, like I would buy them if $ grew on trees}:

Tuscan Fig dish soap from Williams Sonoma {actually found on sale yesterday for $3.99}

Tory Burch back pack {Trying to convince Drew that this would make a cute diaper bag}
Tory Burch black boots
Tory Burch loafers

Massimo Sweater-Target {comes in a lot of cute colors}

Voluspa Candles

Skinny Jeans- Bloomingdales
Tom Ford Sunglasses
Knitt Ugg Boots

Gap Kids

Gap Kids

Gap Kids Riding Pants

Gap Kids, love the jacket


J Crew
Kate Spade purse
Kate Space iPad case

Wednesday, August 10, 2011

Outdoor Chair Cushions {Tutorial}

Two years ago {yes they have looked sad for two years} I purchased two identical outside patio chairs at a small antique shop in Laguna Beach. I love them but the cushions have looked sad since the day I purchased them and I was never motivated to recover them until Drew commented on how bad they looked. You know something looks really bad when your husband starts to comment. So here is my best explanation on how I did them {and I think photos always help}.

Here is what you'll need:
1. Chair seat base {hopefully your chair came with a seat}
2. Quilt batting or foam
3. Fabric for outside of chair seat
4. Staple Gun
5. Scissors

1. Cut current cover off chair cushion
2. Trim any excess cover around the outside of the cushion
3. Cut batting 2 inches larger than bottom of chair and using staple gun, staple batting to bottom of chair cushion. I used quilt batting as my chairs already had foam. If yours are just wood you may want to consider adding foam instead of batting. Both can be purchased at JoAnn's.
4. Measure and cut material for the outside of the cushion. I used table cloth fabric so I could wipe off anything that fell on the chairs. Also it would wick away any water as they are always outside. It was kind of hard to find the fabric. I went to JoAnn's and they had your average picnic table red and white check but I wasn't quite into that. I ended up finding it at a speciality grocery store on Balboa Island but I'm sure you can find it online. It was $9.99/yard and I purchased 2/3 yard.
5. Using staple gun, staple fabric to bottom of chair. I worked my way around in a circle which ended up working well.
6. This is what you will have when you are done. Go around and re-staple any areas that you feel need to be pulled tighter.
7. Trim excess batting/fabric around middle.
8. There you are, your finished cushion.

And here is what they look like finished:


And a random note:
Remember how I vowed to read the newspaper for 30 days? Well, what I didn't tell you was that I currently only subscribed to the OC Register Thursday-Sunday. Well yesterday someone called from the Register and said that as I have been a loyal customer they are going to give me Monday-Wednesday for free! I thought that was pretty opportune timing!


Tuesday, August 9, 2011

DIY Burlap Votives

I was in Old Towne Orange last week looking for a painting to do another project when I popped my head in a cute shop and spotted some burlap wrapped votives. They were $7 each which I thought was a pretty good deal but thought it would be a fun easy project that I could probably do for a lot cheaper. I went home and searched for some more to see if I could get them for cheaper online.

Kaboodle.com -$8.50 each

Also found them at thenewgeneralstore.com for $7.50 each

I was still determined that I could make them on my own. I went to JoAnne's and bought some burlap for $3.99/yard {still trying to figure out another project to do with what I have left}. I tried printing it using my printer but had some major jamming issues. So instead I printed the numbers using a font I liked and put it behind the burlap and traced using a Sharpie marker. You really can't tell at all. I then wrapped them around votives that I got from my mom and hot glued them in place. Here is the finished project:


The "4" is cut evenly at the bottom which I think I prefer to the "5" which had extra that I glued under. A quick fix that I can do today.

I'm finishing up a project today that I tried really hard to document all of the steps. Hopefully I can post it later this week.

And in case you want to be really inspired you should check out this coffee table that my friend Brittany just finished.


Celebrating 75 Years


Last week we celebrated my Grandma's 75th Birthday! She has been such a wonderful grandma and we have had some great memories together. We celebrated by taking a Duffy boat out for a bay cruise with wonderful lunch and yummy dessert. I only hope I can look as good as she does after 75 years. I asked her what her secret was to keeping her skin look so nice {really she doesn't have any wrinkles} and she responded with, "sunscreen".

She was born on July 21, 1936. I did a little research and here are a few facts about what was happening back in 1936:

1. Franklin D. Roosevelt was President
2. Unemployment was 16.9%
3. Cost of a 1st class stamp $0.03
4. Gone with the Wind was first published
5. The first successful helicopter flight was made
6. Cost of a gallon of gas $0.10
7. Average cost of a new house $3,925
8. Completion of the Hoover Dam
9. Queen Mary made her maiden voyage across the Atlantic
10. First sunscreen was invented


Happy 75th Birthday Grandma!


Thursday, August 4, 2011

Avocado Corn Chowder with Chicken

Remember this post, my summer to-do list? Well with the dinner I made tonight I think I can officially cross #10 off the list. I know I have a winner when Drew tells me I should make it again. It is adapted from Cooking Light but I made a few modifications. This would also be a perfect appetizer served withs a mexican or southwestern main course.

Avocado Corn Chowder with Chicken

2 ripe avocados
1 1/2 cups water
1/2 cup fresh orange juice
1 teaspoon honey
1 teaspoon salt
1/2 teaspoon pepper
4 chicken tenders {or 2 full breasts}
1 clove garlic
2 ears fresh corn {husks left on}
1 large red bell pepper
1/2 cup cilantro
lime wedges

1. Peel and coarsely chop the avocados. Place in a blender. Add water, orange juice, honey, salt, pepper, and cilantro until combined.

2. Heat BBQ or grill pan over medium-high heat. BBQ chicken until done {approx. 3 min. on each side}. Place corn {with husks on} and bell pepper on BBQ and cook until corn husk is black and bell pepper is charred {approx. 9-10 min}. Remove from heat.

3. Remove corn husk and cut corn off the cob. Add to avocado mixture.

4. While running bell pepper under cold water peel skin off of pepper, remove seeds and white membrane inside and chop into 1/2 inch pieces. Add to avocado mixture.

5. Shred chicken and set aside.

6. Spoon chowder into bowls; top with chicken. Garnish with cilantro and fresh lime wedges.


Trying Something New for 30 days

Have you watched TED talks? I've watched a few, some are better than others. If you haven't it is a site full of talks by some famous and not-so-famous individuals on just about anything and everything. It was brought up in our life group that there was a good one on trying something new for 30 days {in a row}. He mentions taking a picture {for 30 days}, cutting out sugar {for 30 days}, writing a novel {in 30 days}, etc... I wouldn't say that I'm in a rut and need to do something to change things up but I did like the idea of challenging myself to do something for 30 days because 30 days really isn't that long. So I got to thinking, what should I do for 30 days??? And I came up with the not so interesting and probably not so popular thing to do:

I will read the {a} newspaper for 30 days

You see, I used to be surrounded by the news with my previous job, especially business news. I knew what the market was doing, what political events were going on, what company had spectacular earnings. And well now, I feel like I could always tell you the weather. And I kind of miss it. And I don't blame anyone but myself because I sure do read a lot of other things during the day. So here's to my 30 days of reading the news {and not all the bad things that are going on, there are still good things happening out there too}!

If you would like to listen to the TED talk you can find it here.

What are you going to do?

Tuesday, August 2, 2011

Traveling with A Baby- We Survived!

We had a wonderful trip {trip- yes, vacation- no as my husband would say} to Hawaii with my in-laws and family friends. There were 5 kids under 3 which kept things busy. All kids napped at 1 and were asleep by 7 which was awesome! And we always had a babysitter {thank you aunt brittany, shea and grandma for watching little Morgie}. I had no idea what to bring so I brought everything. Here are a few things to note:

1. Airlines DO NOT charge for carseats, pack-n-plays or strollers. This was nice as I was checking all three!

2. Buy a $10 Gate Check bag for the car seat and throw other stuff in the bag. I also put in some blow up toys, sunscreen, etc... in the bag and it fit perfectly. My bag didn't get too dirty but will probably only last one more trip.

3. Bring a Boppy on the plane with you. This was key to saving my arms. Morgan was an angel on the plane {fell asleep after 5 minutes on the flight and slept the whole way home}!

4. I kept my toys in a plastic bag so I could easily pull them out of my diaper bag and it kept things clean.

5. I used the KidCo tent for the beach. It was wonderful to be able to put her in something that I knew was big enough and comfortable for her. They retail for about $60 but I'm sure it would be something you could borrow from a friend or find on Craigslist.

6. You can take as much breast milk/formula with you through security {they did have to bomb test it, which came back negative}.

7. The portable high chair worked great too. For $18 it was well worth it. It is still a bit big for her but it did the job.

We had a wonderful time and the overall experience was great. Now Drew and I need to start planning that vacation...

Monday, August 1, 2011

Fresh Blueberry Muffins


I bought a huge thing of blueberries at Costco and was determined to make some fresh blueberry muffins. I searched for some great recipes but a lot of them called for sour cream or buttermilk {both of which I did not have}. With a napping baby I was not about to go out to the store. Instead I decided to try some with Greek yogurt. They turned out great!

Fresh Blueberry Muffins

Yield: 12 muffins

2 cups all-purpose flour


1 tablespoon baking powder


½ teaspoon salt


1 egg


1 cup granulated sugar


4 tablespoons (2 ounces) unsalted butter, melted and cooled slightly


1 cup sour cream


2 cups frozen or fresh blueberries

1. Preheat the oven to 350 degrees. Grease a standard 12-cup muffin tin (or line with paper liners) and set aside.

2. Whisk the flour, baking powder and salt in a medium bowl until well combined. Whisk the egg in a separate medium bowl until well combined and light-colored, about 20 seconds. Add the sugar and whisk vigorously until thick, about 30 seconds. Add the melted butter in 2 or 3 additions, whisking to combine after each addition. Add the yogurt in 2 additions, whisking just to combine.

3. Add the berries to the dry ingredients and gently toss just to combine. Add the sour cream mixture and fold with a rubber spatula until the batter comes together and the berries are evenly distributed, 25 to 30 seconds. Small spots of flour may remain and the batter will be very thick. Do not overmix.

4. Using a large spoon or a cookie scoop sprayed with nonstick cooking spray, divide the batter amount the muffin cups. Bake until the muffins are light golden brown and a toothpick or thin knife inserted into the center of a muffin comes out clean, 25 to 30 minutes, rotating the pan from front to back halfway through the baking time. Immediately remove muffins to a wire rack and cool for at least 5 minutes. Serve immediately or at room temperature. Store leftovers in an airtight container at room temperature.
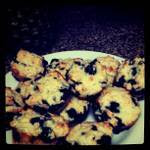

Sorry for the Instagram picture {my sister in-law has me addicted}!

Monthly Baby Pictures

I finally took Morgan's 7 month baby photos {a few days late}. I wanted to do something fun for the backdrop. I took a look at what wrapping paper I had on hand, and found one that matched perfectly. I found a wall wide enough that I didn't have to cut the wrapping paper. I taped it high enough on the wall that it wouldn't show when I took the photos and continued it down on the floor. I would probably do it on a harder surface next time {this was done on carpet}. I think they turned out pretty cute.

Here are some of the better one's. I think I took about 80 photos just to get these good one's. Some of her expressions were pretty funny.

One good smile.

This is exhausting!


One of my favorites

Note:
Babies love to wrinkle wrapping paper!


What she would rather be doing:


I'm not sure why these photos uploaded so blurry {they look totally clear on my computer}. Oh well...
Related Posts Plugin for WordPress, Blogger...