Showing posts with label DIY. Show all posts

Thursday, October 27, 2011

Pinterest Projects

I actually went back and looked at my "Projects to do" pinboard the other day and there are so many cute projects that I want to do. 

Knock-off Z-Gallerie Subway Art


Hypertufa Pots

Pinned Image


Ruler Growth Chart

Pinned Image


And one that I actually completed. Here's my inspiration:

Pinned Image


And my completed project. The before:


Definitely could have been in my great-grandma's house. I purchased it at a local antique store for about $10. 

And after I did my paint-by-number:


A little brighter than the original. 


Wednesday, October 5, 2011

Burlap Monogram {tutorial}

I had WAY too much burlap left over from when I did my burlap wrapped votives. I had no idea what to do with the left over fabric. Of course, I immediately searched "burlap" on Pinterest and was inspired by this photo:


Using the picture above as inspiration I made my own version. Here is how it turned out:


It was really quite simple to do. Here is what you'll need:
1. Printed letter of your choice in whichever font you wish
2. piece of card board for back, I used the lid of a shoe box which worked particularly well and gave it a little more depth than just a flat piece of cardboard
3. stapler
4. quilt batting cut about 3 inches larger than cardboard {on all sides}
5. burlap cut about 3 inches larger than cardboard {on all sides}
6. sharpie marker


Step 1: Staple batting around cardboard. I did two layers as my cardboard was hot pink and I didn't want any of that to come through but if yours is brown you should be good with one layer.
Step 2: Place printed monogram under burlap and trace along the outside of your printed letter. Make sure to center up the letter on the burlap so you have enough to wrap the burlap around your cardboard. You can measure or just eye-ball it.


Step 3: Color in the monogram with your marker. I went over it a couple of times to make sure it was nice and dark.
Step 4: Center and staple the burlap to your cardboard.
And your done!
This is seen on the Link Party at 320 Sycamore, projects under $10 in under 1 hour. See what other people have posted here.

This is also linked at A Little Tipsy: DIY under $5. Check it out here.

Monday, September 12, 2011

Fall Wreath {tutorial}

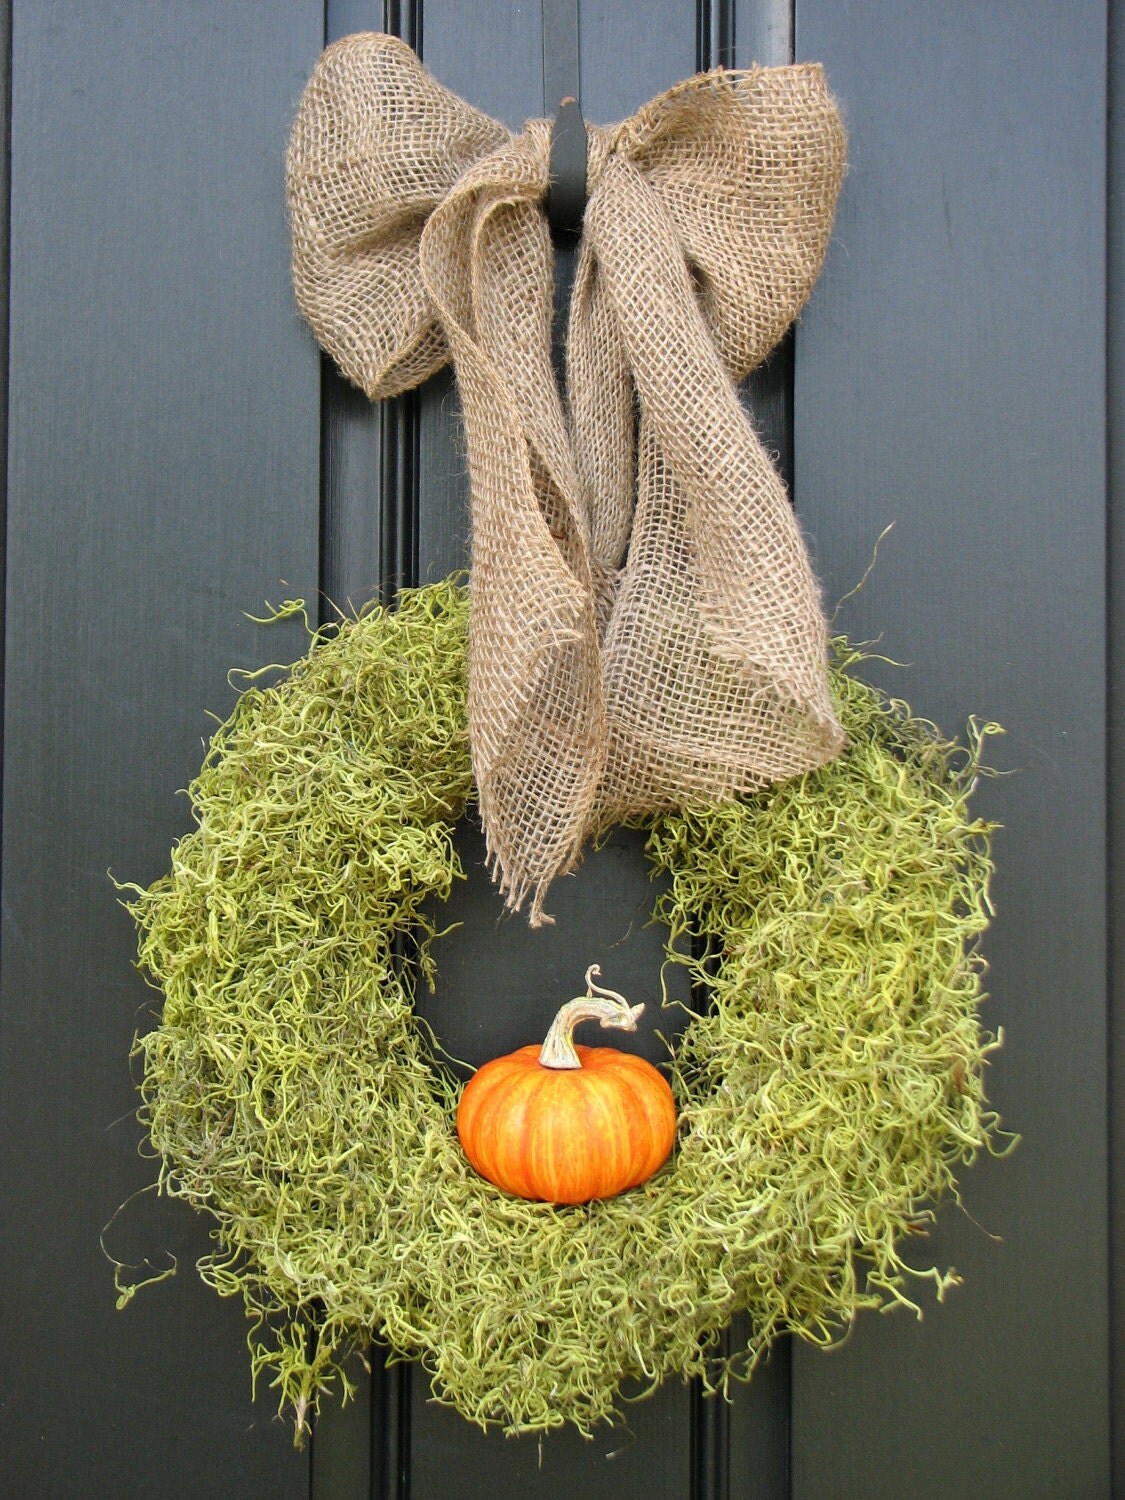
I must be in a crafty mood because I feel like I have a lot of tutorials to show you. Remember the wreath below?

Fall Wreath - It's The GREAT Pumpkin Wreath with Burlap Bow - Original

Well I got around to making my own this week. I was really pleased with how it turned out.


Here's what you'll need:
1. wreath form {Michael's $5.99}
2. green moss {I had some left over but I also saw some at Michael's for $3.99}
3. pumpkin{s} or fall decor of your choice {Michael's $1.97}
4. ribbon/burlap if you would like to hang your wreath
5. and your handy glue gun/hot glue
1. Start by covering wreath base with moss. I went around the front first, then did the inside, and finally around the back. Glue, moss, glue, moss, glue, etc....
And keep going...


2. Keep going, all the way around. Fill in any empty spaces with more moss. Here's what you'll have:
3. Add pumpkin by putting a LOT of hot glue on the bottom of the pumpkin and attach to middle of inside of the wreath.
I decided that I wanted to hang mine in my kitchen so I didn't add any ribbon or burlap. Mine is just hanging from a nail which you can't see at all because there is so much moss. It is a pretty fragile wreath so I think it might be best kept indoors. Or you could use a less fragile moss than I did and it would look great on a front door. And one last thing to note, my moss had some green dye so my nice white grout and tile turned a nice shade of green. After some bleach it is as good as new but I definitely should have put down some newspaper.

And to make my Fall wreath into a Winter wreath I'm thinking of removing the pumpkin {got to love hot glue for the ease of removing} and put some ornaments up instead.


Sunday, September 11, 2011

Silver Shells {tutorial}

There are always a lot of home decor items using shells, especially here in Southern California. They are found on frames, mirrors, vases, etc...I needed something to dress up my guest bathroom and had seen shells dipped in silver that I thought would be a really nice addition. At upwards of $200 each they were not in my budget. I thought it would be pretty easy to spray paint ordinary shells using metallic spray paint, and I proved to be correct. Here's what you'll need:
1. Metallic Spray Paint {I used silver but gold would be pretty as well} $6.50 at ACE
2. An assortment of shells
3. Newspaper

And here's the process:

1. Lay shells out on newspaper in well ventilated area {you can see I did not do this inside below}
2. Spray paint evenly over one side and wait about 15 minutes to dry. Flip shells over and paint the other side.
3. Wait another 15 minutes until paint is all dry and put you're all done! Super easy.

I put mine in a glass jar but they would be really cute on a picture frame or around an old mirror.

And my personal favorite were the sea urchins:


Saturday, September 10, 2011

Fall

I can officially say that it is finally starting to feel like fall here in Southern California. We had the hottest days of the year earlier in the week {thought I was going to melt} but it has finally cooled off and that fall feeling is in the air. We actually woke up to thunderstorms this morning which is especially unusual this time of the year, well any time of the year. It was kind of nice and was a good excuse to have a relaxing morning. Husband went surfing, which is probably not the smartest thing to do but it's not like I was going to stop him.

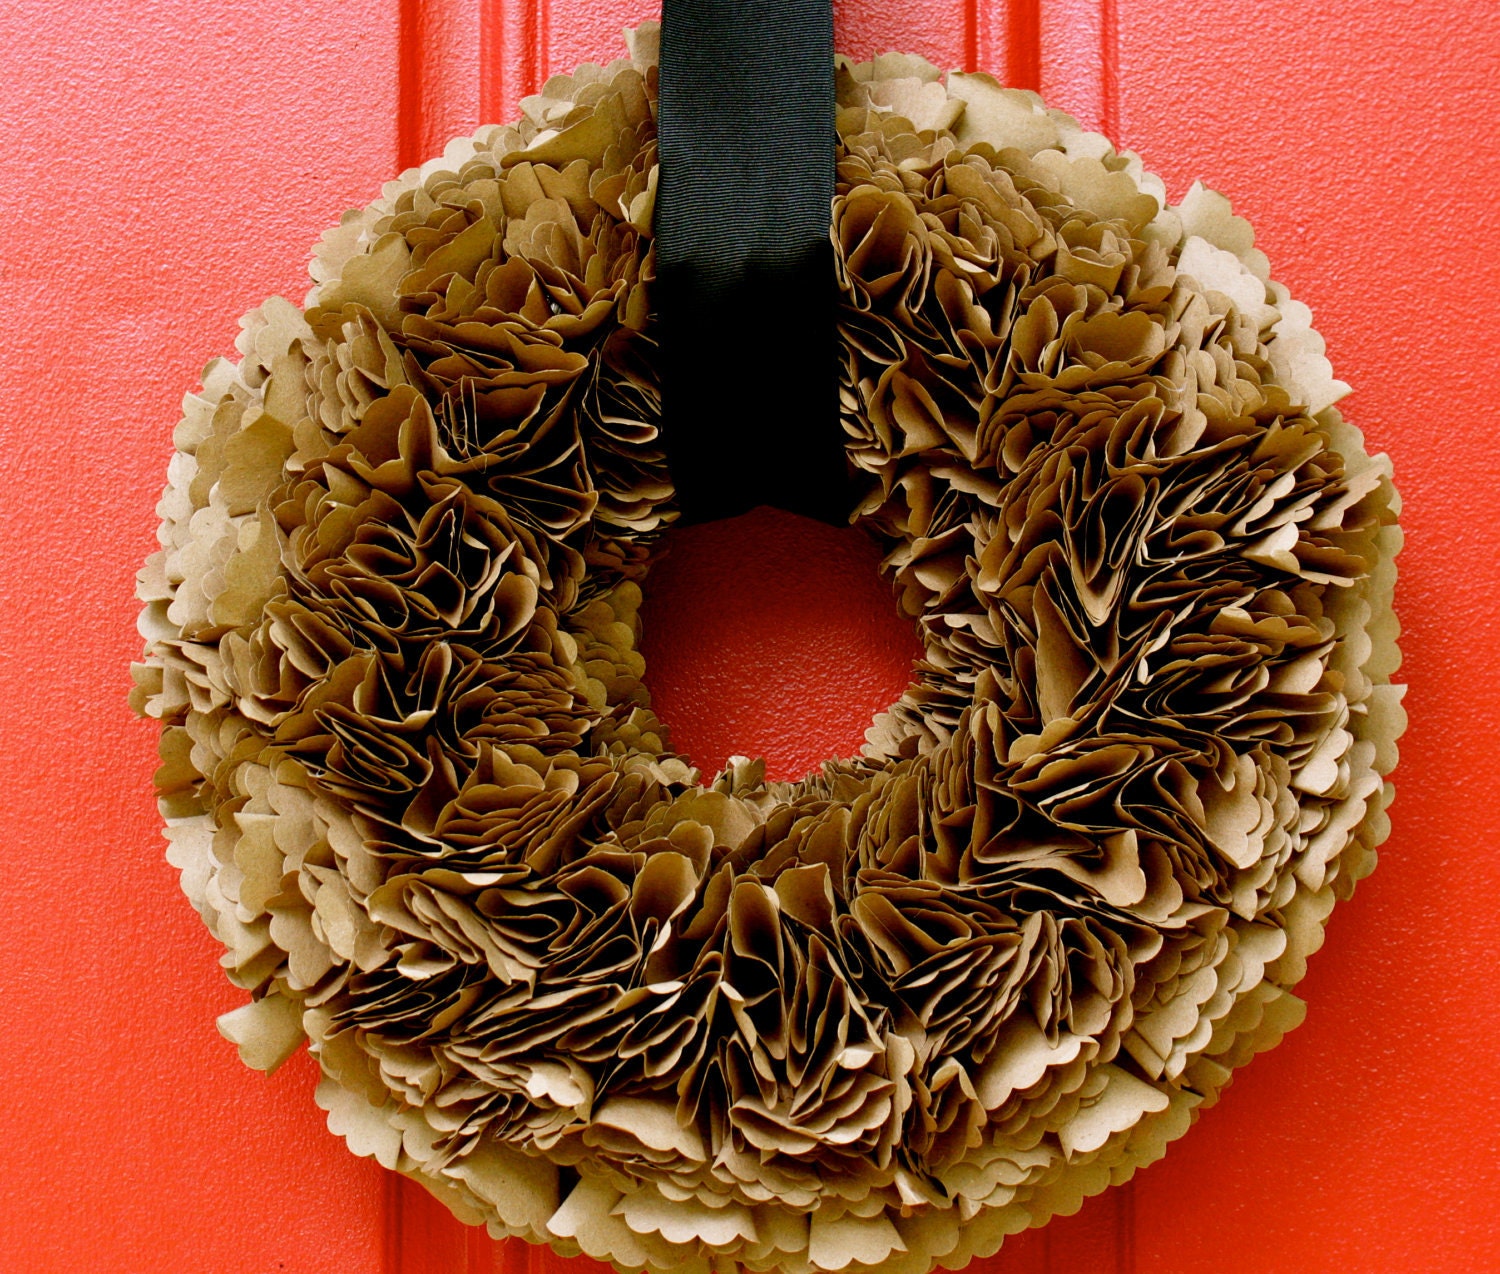
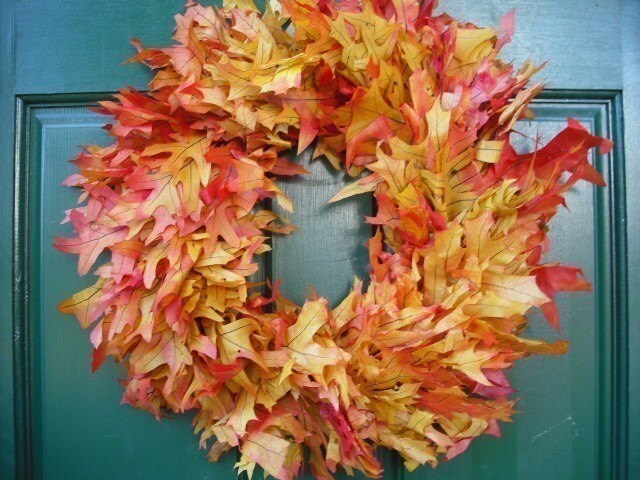
I love the fall, we got married in the fall, husband's birthday is in the fall, love a good fall meal, college football, throwing on a scarf, etc...As much as I love the fall I hate Halloween. I'm not a big fan of dressing up, don't like to be scared {AT ALL}, just not a fan. This hatred probably stemmed from an itchy fairy costume in the kindergarten Halloween parade and I remember it like it was yesterday. Maybe I'll enjoy it more now that I have a cute baby to dress up {already got her costume}. Needless to say I don't really decorate for Halloween but I do like some fall decor around the house. I was looking for some inspiration of a cute fall wreath for the front door. Here are some ideas I found on Etsy. The links to the individual shops are below.

Recycled Beautiful Brown Paper Wreath

Preserved Autumn Oak Leaf Wreath

And my favorite that I'm going to try and DIY {husband asked what DIY stands for last night, oh I have so many things still to teach him}:
Fall Wreath - It's The GREAT Pumpkin Wreath with Burlap Bow - Original


Happy Fall!

Thursday, September 1, 2011

Eye Chart Art

After moving our stuff in and hanging things on the walls I had a bunch of frames filled with pictures that I wasn't too fond of anymore. I have always loved the wall chart art that means something special. Apartment Therapy had a whole post about them. You can see some great images on there post here.
After looking around, I found there is an eye chart maker online. Website none other than :eyechartmaker.com

You are limited to the number of characters so it takes some creativity/messing around with what you want to say to have the correct amount of characters. I decided to do our families names and birthdays. Here is what I came up with.


Monday, August 29, 2011

Wall Collage


I have always loved wall collages, and have always had some form of them in my house. So with this new house, I knew I wanted to put one up. My husband and I have also had many a "tiffs" whilst hanging our wall collages. Let's just say I'm like, "a little to the right", and he is like "it's totally straight". So this time around I was determined to get it right, and I attempted to do it on my own.

I had seen pictures of tracing and cutting all the frames you want to hang and marking where the nails would go. This sounded like a no-fail solution....and it almost was. Haven't seen what I'm talking about, here are some examples:


So I had my wall, chose the frames I wanted and began taping. I also knew I wanted to make a complete rectangle which ended up being a little tricky because you need to make sure you have enough/the right size frames to do so. Here are my lessons learned:

1. Just because you have the exact same picture frame, from the same store and the same size does not mean the hook to mount the picture is in the same place. I had 3 of the same frame and just made 3 copies, didn't work. You see for some reason each had the picture hanger in a slightly different place, which ended up in crooked, not equally spaced pictures.

2. Double check where your hooks are on your frames compared to where you have marked them on your paper. I had a bit of a problem when I put a nail in to where the hook was apparently going to be, only for it to be two inches off.

3. Enlist your husband to help you, because at the end of the day he is going to want to help you anyways.

Here are some pictures of the process:


A little help from the husband:

The final result:


Wednesday, August 10, 2011

Outdoor Chair Cushions {Tutorial}

Two years ago {yes they have looked sad for two years} I purchased two identical outside patio chairs at a small antique shop in Laguna Beach. I love them but the cushions have looked sad since the day I purchased them and I was never motivated to recover them until Drew commented on how bad they looked. You know something looks really bad when your husband starts to comment. So here is my best explanation on how I did them {and I think photos always help}.

Here is what you'll need:
1. Chair seat base {hopefully your chair came with a seat}
2. Quilt batting or foam
3. Fabric for outside of chair seat
4. Staple Gun
5. Scissors

1. Cut current cover off chair cushion
2. Trim any excess cover around the outside of the cushion
3. Cut batting 2 inches larger than bottom of chair and using staple gun, staple batting to bottom of chair cushion. I used quilt batting as my chairs already had foam. If yours are just wood you may want to consider adding foam instead of batting. Both can be purchased at JoAnn's.
4. Measure and cut material for the outside of the cushion. I used table cloth fabric so I could wipe off anything that fell on the chairs. Also it would wick away any water as they are always outside. It was kind of hard to find the fabric. I went to JoAnn's and they had your average picnic table red and white check but I wasn't quite into that. I ended up finding it at a speciality grocery store on Balboa Island but I'm sure you can find it online. It was $9.99/yard and I purchased 2/3 yard.
5. Using staple gun, staple fabric to bottom of chair. I worked my way around in a circle which ended up working well.
6. This is what you will have when you are done. Go around and re-staple any areas that you feel need to be pulled tighter.
7. Trim excess batting/fabric around middle.
8. There you are, your finished cushion.

And here is what they look like finished:


And a random note:
Remember how I vowed to read the newspaper for 30 days? Well, what I didn't tell you was that I currently only subscribed to the OC Register Thursday-Sunday. Well yesterday someone called from the Register and said that as I have been a loyal customer they are going to give me Monday-Wednesday for free! I thought that was pretty opportune timing!


Tuesday, August 9, 2011

DIY Burlap Votives

I was in Old Towne Orange last week looking for a painting to do another project when I popped my head in a cute shop and spotted some burlap wrapped votives. They were $7 each which I thought was a pretty good deal but thought it would be a fun easy project that I could probably do for a lot cheaper. I went home and searched for some more to see if I could get them for cheaper online.

Kaboodle.com -$8.50 each

Also found them at thenewgeneralstore.com for $7.50 each

I was still determined that I could make them on my own. I went to JoAnne's and bought some burlap for $3.99/yard {still trying to figure out another project to do with what I have left}. I tried printing it using my printer but had some major jamming issues. So instead I printed the numbers using a font I liked and put it behind the burlap and traced using a Sharpie marker. You really can't tell at all. I then wrapped them around votives that I got from my mom and hot glued them in place. Here is the finished project:


The "4" is cut evenly at the bottom which I think I prefer to the "5" which had extra that I glued under. A quick fix that I can do today.

I'm finishing up a project today that I tried really hard to document all of the steps. Hopefully I can post it later this week.

And in case you want to be really inspired you should check out this coffee table that my friend Brittany just finished.


Thursday, May 26, 2011

DIY Headboard

I have always wanted an upholstered headboard and at $500 it is definitely cheaper than going for a wood frame bed. I also like furniture that isn't all matchy-matchy. I'm not sure I'm ready to make the decision of what bed frame I want for the long haul, but for less than $100 am willing to try and make an upholstered headboard for the time being. I searched the web and the best tutorial I found was from censationalgirl.com. She gives step by step instructions and lists the best supplies to use.

I bought my fabric ($6/yard on deep discount at JoAnns), nailheads (bought online for $20) and batting. I just need to go to Home Depot and buy my ply wood and I'm set to go.

We're off to Northern California for a wedding and some wine tasting this weekend but I'm hoping to have it done next week.

Thursday, May 19, 2011

Milestone Onesies

I received this frame as a shower gift from Pottery Barn Kids and wanted to do something cute to commemorate each monthly milestone for Morgan's 1st year.

I looked online and saw a bunch of cute examples of onesies I could buy. I thought it would be pretty easy to do it myself with some iron-on transfer paper and a white onesie. They turned out pretty cute. I messed around with fonts until I found one I liked and changed the background color each month. Here is her 4 month picture.

I can't believe she will be 5 months next week!

Monday, May 16, 2011

Phone Case & Mother's Day


I have been on the hunt for a new phone case and was in love with ones from Dani Notes and Rosie Posie Designs on Etsy. At $50 each I knew there had to be a cheaper option. It was that same week that I saw a post on Honey Were Home with an idea to make your own. So that is what I did. I bought a clear case from ebay ($6.95 including shipping) and designed the rest on Microsoft Publisher. I got the specs for the phone size online and just used a hole punch so the camera would work. It was super easy and I can always change it out to another color/design.

Here are a couple that I did:


And my 1st Mother's Day was amazing! This is what I woke up to:
Yes, those are petals from some old tulips on the top of the placemat. Probably not my husband's most creative moment, but kind of cute. And my champagne glass is empty, but he did have mimosas ready.

Hope you all had an amazing Mother's Day!


Related Posts Plugin for WordPress, Blogger...